Maximize the performance and availability of your WordPress site with Enterprise WordPress Hosting that offers automatic scaling and high availability Ensure your site is always up and running smoothly, even during high traffic periods Our powerful …
Maximize the performance and availability of your WordPress site with Enterprise WordPress Hosting that offers automatic scaling and high availability. Ensure your site is always up and running smoothly, even during high traffic periods. Our powerful clustering approach reduces the risk of downtime and improves overall performance, delivering an exceptional experience for your end-users.
In this guide, we’ll show you how to:
- Set up a LightSpeed-powered WordPress cluster and a highly available MariaDB Galera cluster
- Enhance your site’s speed with a premium CDN that supports HTTP/3 (QUIC)
- Secure your site with a free, automatically renewing Let’s Encrypt SSL certificate
- Connect your custom domain and keep your certificate up to date
- Scale dynamically based on your site’s load for optimal performance”
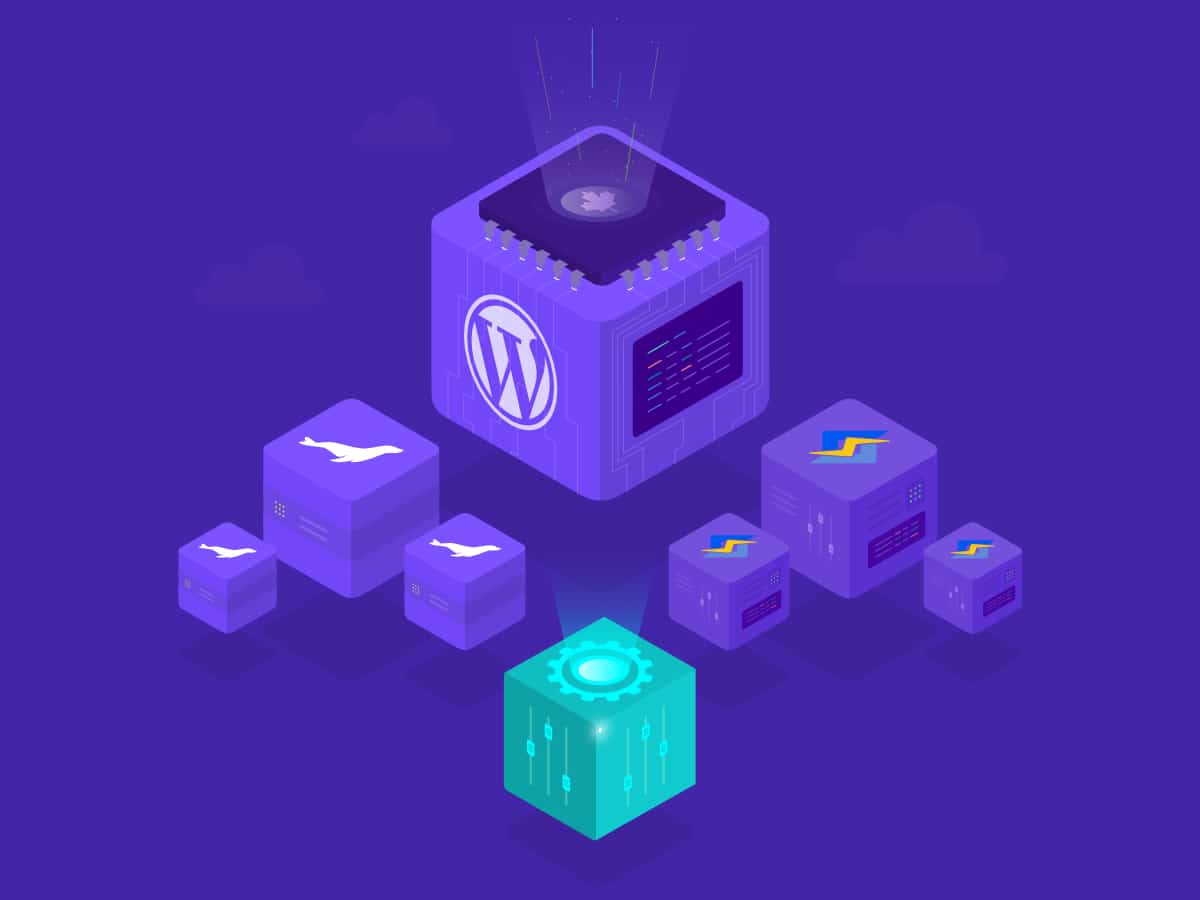
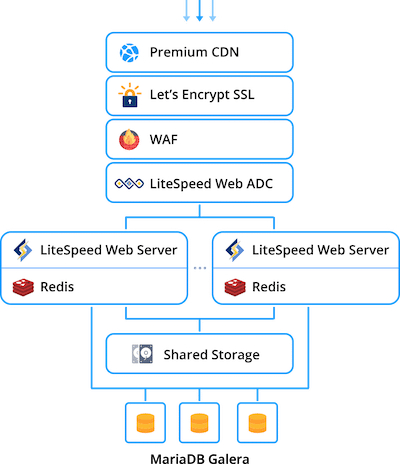
Get a Closer Look at the Components of a WordPress Cluster
Discover the benefits of a pre-packaged WordPress cluster with various installation options available in the FullHost.Cloud Marketplace. Explore all components to understand how this solution operates and what results can be achieved.
Accelerate Your Site with Premium CDN Add-On
Enhance the user experience of your WordPress site and improve your Google ranking with a Premium CDN Add-On integrated into your WordPress cluster. With a highly interconnected global network, massive bandwidth capacity, advanced caching, and HTTP/3 support, your site’s static assets will load lightning-fast from the nearest PoP. With 130+ Super PoPs located across six continents, FullHost.Cloud customers can enjoy premium traffic at a consistent price without unexpected bills based on geography.
Secure Your Site with Automated Let’s Encrypt SSL
Ensure a secure connection for your site with the Let’s Encrypt SSL Add-On. This add-on automates the process of obtaining trusted SSL certificates, validating your custom domain, and renewing your certificate for peace of mind.
Optimize Performance with LiteSpeed Web ADC
Experience the next level of load balancing with LiteSpeed Web ADC, a cutting-edge Application Delivery Controller that supports the latest HTTP/3 protocol. Enjoy a flexible traffic distribution algorithm for optimal performance, as well as dynamic caching with ESI that delivers dynamic content directly and reduces server requests.
Protect Your Site with Built-In Web Application Firewall (WAF)
Stay secure with the built-in Web Application Firewall (WAF) feature in LiteSpeed Web Server. The WAF provides Layer-7 Anti-DDoS Filtering, WordPress brute force protection, IP level bandwidth and request rate throttling, and dynamic request rule management for optimized computing power.
Experience High Performance with LiteSpeed Web Server
Enjoy a scalable, high-performing, and low memory-consuming web server with an extensive feature set including ESI, browser, and object cache, optimized CSS, JavaScript, and images, support for HTTP/3, CDN, WAF, Geo-DNS, CAPTCHA, IP throttling, and advanced anti-DDoS protection – all with LiteSpeed Web Server.
Ensure Data Reliability with MariaDB Galera Cluster
Store dynamic content with confidence using the MariaDB Galera Cluster. With its true multi-master topology and automatic node provisioning, you can guarantee no data loss in the event of a crash, no slave lag, and no lost transactions.
Accelerate Your Site with Redis Caching
Speed up your site with Redis, a high-performance RAM-based data structure store running in the LiteSpeed Web Server container. Object caching stored loaded database query results and quickly serves requests for improved performance.
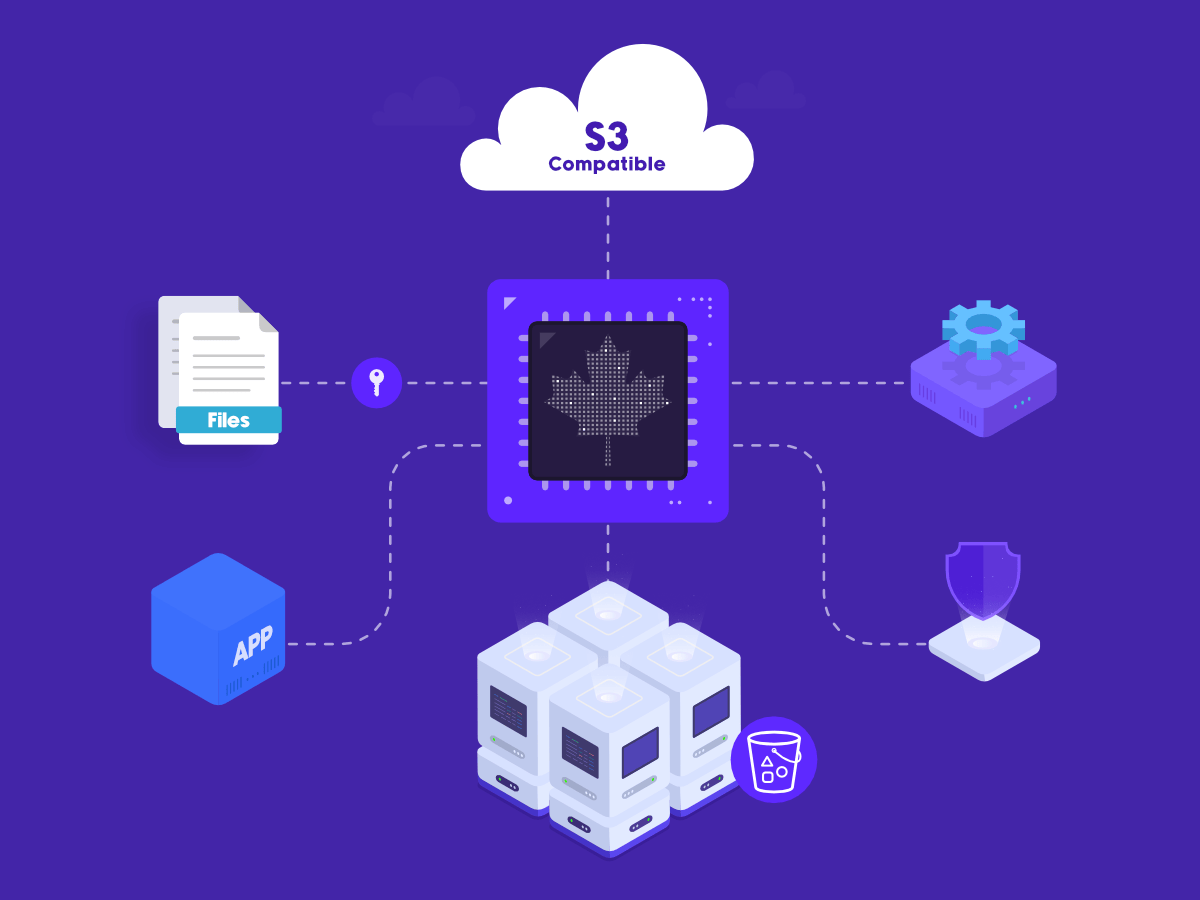
Store WordPress Assets with Shared Storage
Ensure all web servers in your cluster have access to your WordPress static assets with Shared Storage.
Streamlining the Installation of a WordPress Cluster with FullHost.Cloud
Deploying a WordPress cluster can be a complex and time-consuming task, but with FullHost.Cloud, the process is made much simpler. The platform does most of the work for you, and all you need to do is specify your preferences with just a few clicks.
To deploy the WordPress Cluster, you can follow these steps:
1- If you don’t have a FullHost.Cloud account, you can register and deploy the WordPress Cluster by clicking the “DEPLOY TO FULLHOST.CLOUD” button.
If you’re a registered user, you can install the WordPress Cluster Kit directly from the FullHost.Cloud Marketplace from the dashboard.
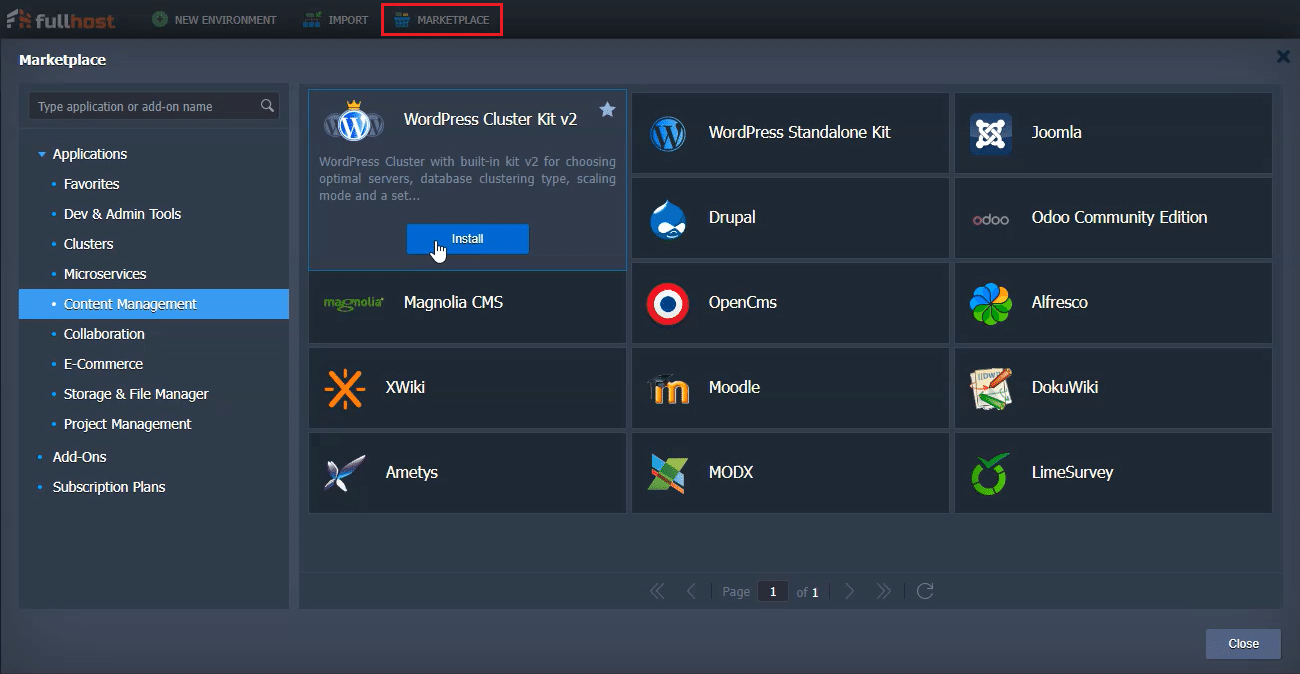
2- Personalize Your WordPress Cluster with Customization Options in the Installation Window.
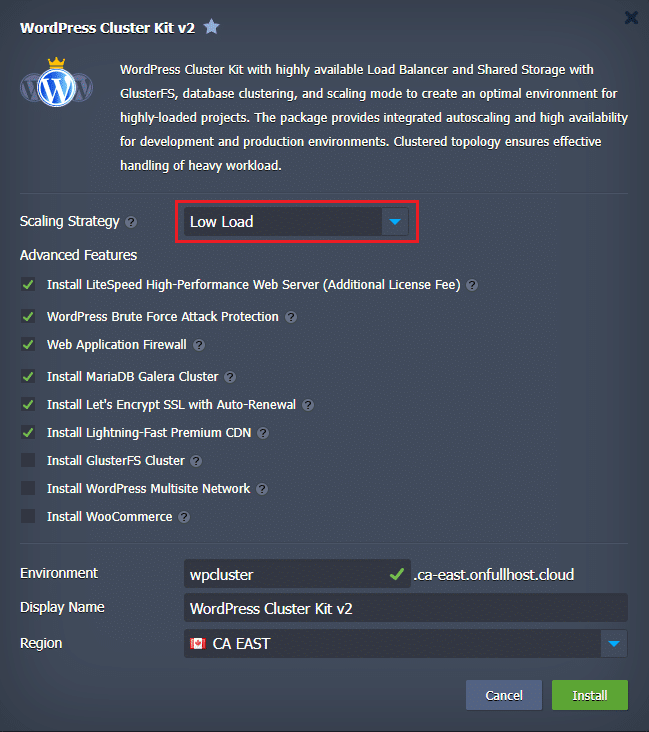
The Scaling Strategy is designed to anticipate future load increases in the cluster and horizontally scale out the application servers to prevent WordPress downtime.
Here’s how it operates:
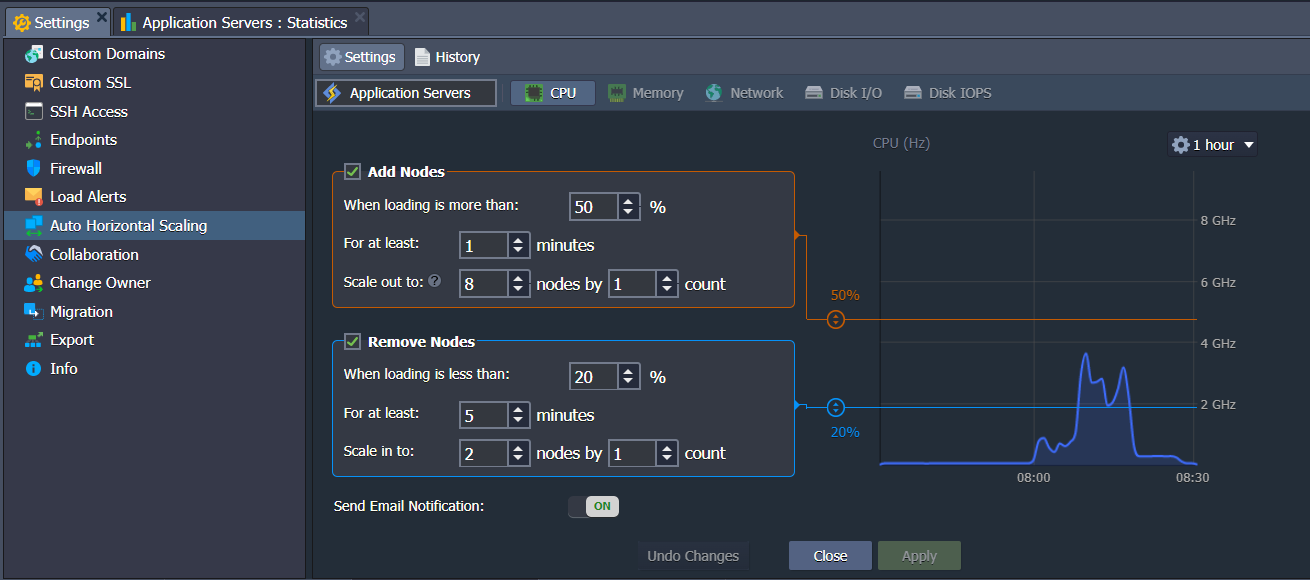
FullHost.Cloud allows for automatic scaling of servers through configured triggers. Based on our experience, we have provided three common scaling scenarios for WordPress to avoid overloading (these settings can be changed post-installation):
- Low Load: An application server node is added if the workload exceeds 70% and removed if it drops below 20%.
- Medium Load: An application server node is added if the workload exceeds 50% and removed if it drops below 20%.
- High Load: Two application server nodes are added if the workload exceeds 30% and one is removed if it drops below 10%.
3- Activate Advanced Features for Enhanced Performance and Security:

LiteSpeed Web Server and Web Application Delivery Controller are the base for the high-performance web server cluster, providing speedy delivery of website content to clients via the modern HTTP/3 protocol. If you opt-out, the cluster will be installed with the NGINX web server and load balancer. Additionally, you have the option to enable the Web Application Firewall (WAF) for extra security, which is only available when using the LiteSpeed Web Server.
Note: It is important to note that configuring the Web Application Firewall (WAF) through the LiteSpeed Web Admin Console is not recommended as it may cause issues during horizontal scaling. To adjust the WAF after installation, it is recommended to use the WAF=TRUE/FALSE environment variable, and to restart the application layer nodes after making changes.
By choosing the MariaDB Galera Cluster option, you will ensure your database has high availability and failover capabilities through synchronous replication across multiple nodes. This configuration uses the InnoDB engine and enables direct read and write operations to any node. In contrast, if you opt not to use this option, a standalone MariaDB database will be installed, which may result in decreased high availability and failover capabilities.
Note: When migrating an existing database to a MariaDB Galera Cluster, it’s important to keep in mind the following requirements:
- All tables must be of the InnoDB/XtraDB type
- All tables must have a PRIMARY index
Lightning-Fast Premium CDN with 130+ Points of Presence: This integrates Verizon Edgecast CDN into your WordPress application to improve content delivery speed.
Let’s Encrypt SSL with Auto-Renewal: This allows you to obtain and use a free, trusted certificate for your custom domain. The auto-renewal function prevents certificate expiration, and notifications are sent via email.
WordPress Multisite Network: This feature allows your application to act as a hub for multiple websites, and enables you to create a network of sites for commercial usage.
4- Complete the Deployment Process by Finalizing the Details. In the final step, give your environment a descriptive name, choose a custom Display Name (if desired), select the preferred availability region (if available), and click the Install button. FullHost.Cloud will handle the rest, installing your WordPress Cluster in just a matter of minutes. Sit back and relax while the platform does the work for you.
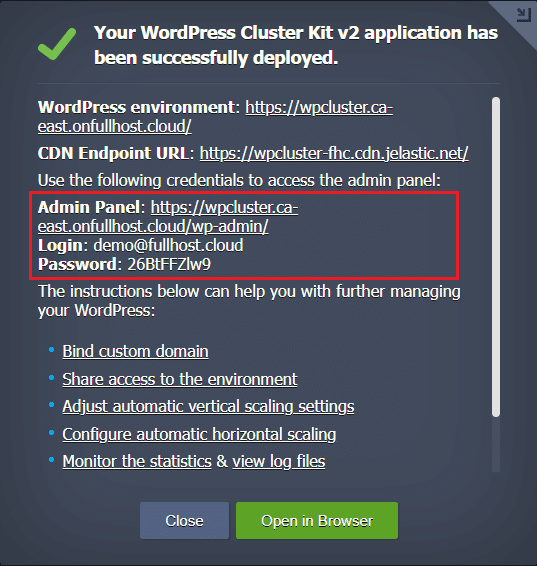
Access your WordPress application using the links and credentials provided in the successful installation frame or email.
Configuring Domains and SSL Certificates
To ensure your WordPress environment is production-ready, it is recommended to have a public IP address and custom domain. This will allow you to share information about your resources across the internet.
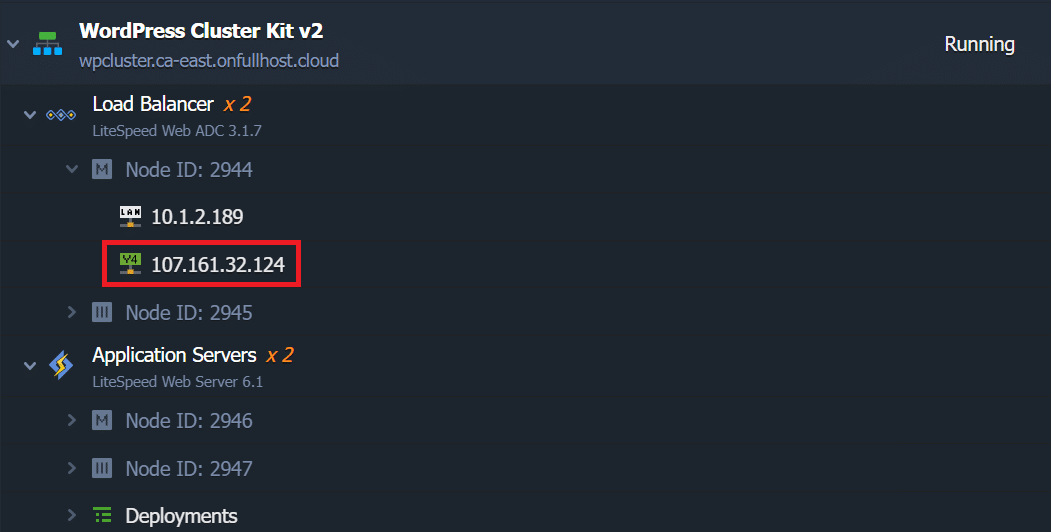
If you installed WordPress with the Let’s Encrypt SSL Add-On, the public IP address was already added to the Load Balancer node.
The next step is to bind a custom domain to the environment and obtain a trusted SSL certificate for it.
1- To set up your custom domain, create an A record for it that maps to the public IP address assigned to the Load Balancer. If you are unsure how to do this, follow the steps in this guide.
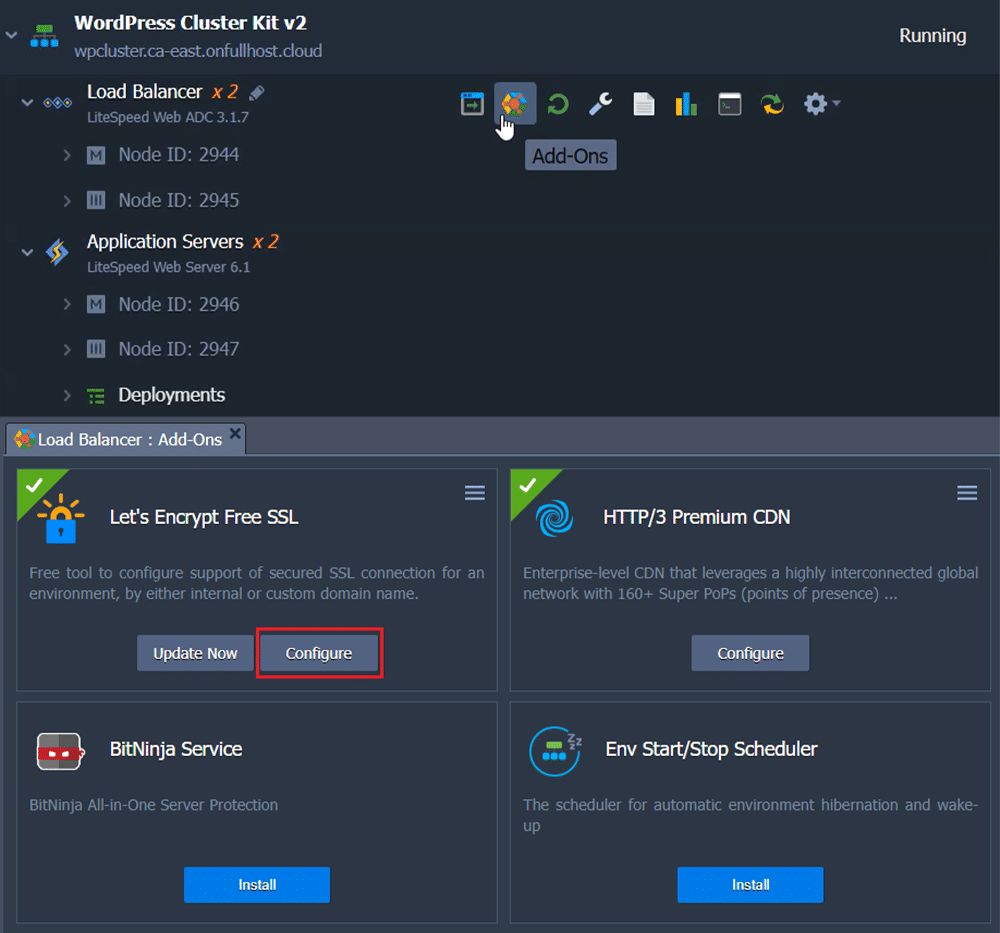
2- Locate the Let’s Encrypt Free SSL add-on among the Load Balancer add-ons and click the Configure button.
3- Enter your custom domain (e.g. wordpress.fullhost.dev) into the designated field and hit the Apply button.
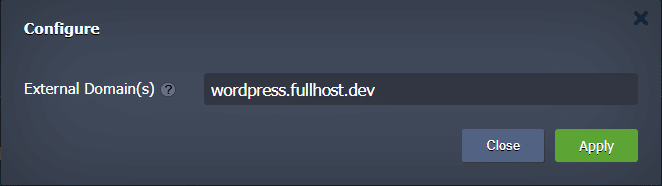
4- Once the SSL certificate is successfully issued, you will receive a notification through a popup and an email.
- Finalize your setup by verifying all links within your WordPress application are pointing to your custom domain. To do this, access the admin panel using the link and credentials from either the successful installation window or the email you received. Navigate to the Settings section and check that the WordPress Address (URL) and Site Address (URL) fields are set to your custom domain. If not, make the necessary changes.
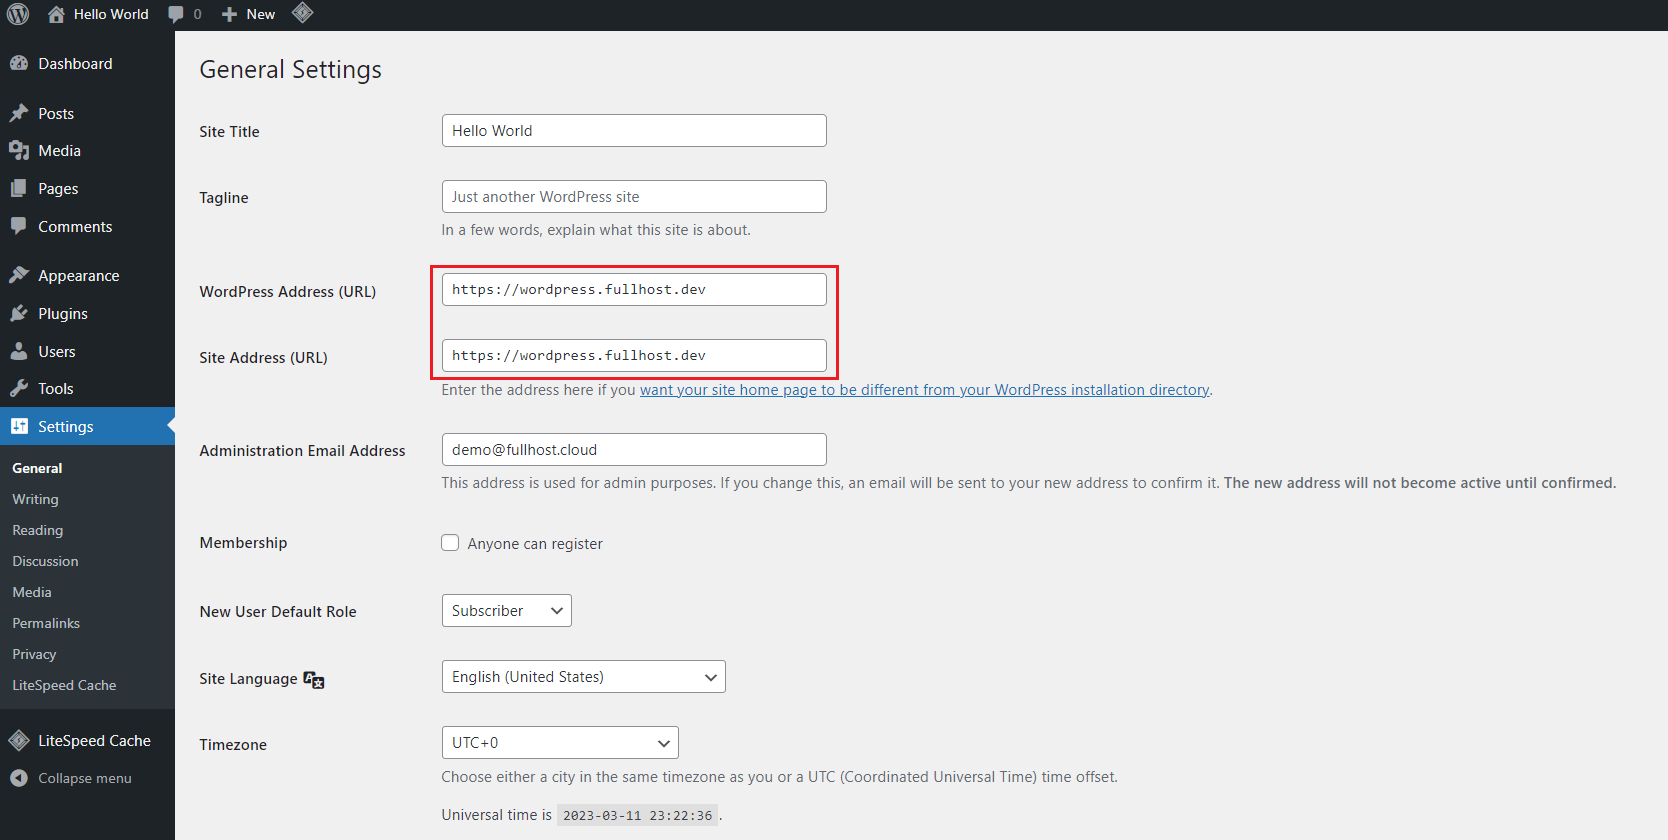
5- Finally, don’t forget to save your changes by clicking the “Save Changes” button at the bottom of the Settings page. Then, open your WordPress application using the new custom domain address.
With these steps completed, you now have a production-ready WordPress cluster with high availability and robust security features. The use of the latest generation LiteSpeed application servers, a fast and efficient load balancer with support for HTTP/3, dependable MariaDB Galera, built-in CDN, and trusted Let’s Encrypt SSL certificate ensure superior performance.